XLITE - Dashboard
Based on cloud computing architecture and web applications, the dashboard can be accessed anywhere, anytime, and on any device. Users can control and monitor any light in real time, scheduled dimming, set up an alarm, query history, generate reports, and much more.
Dashboard URL: https://xlite.xvision.technology
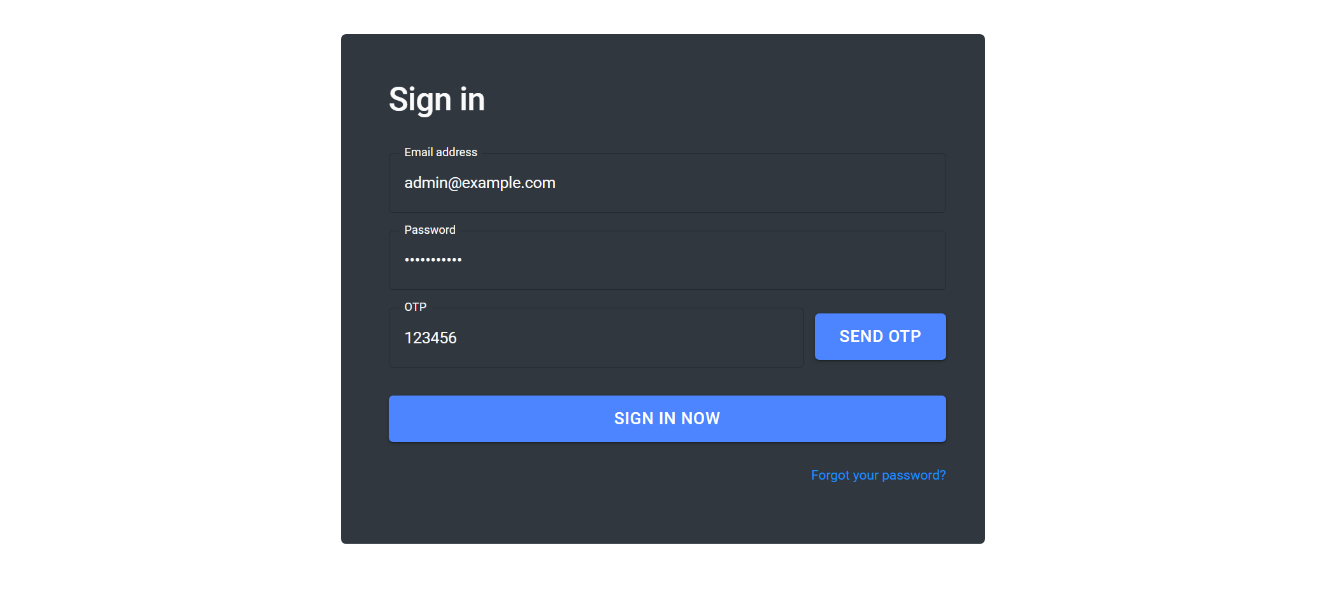
Enter the registered email address and password, then press “SEND OTP” to receive the OTP login code from the registered email address.
Enter the received OTP code “XXXXXX” in the OTP field, then press “SIGN IN NOW” to access the dashboard.
1. Home page
This page shows an overview of the system, including the number of the ONLINE/OFFLINE devices, and any events that need attention.

2. Home page
This page shows a table of the devices, which each column can be filtered by the column header.
Normally all devices in the same area (buildings, streets, parks…) can be combined into one group for easy management.
Choose “Filter by group” to only display devices in that selected group.
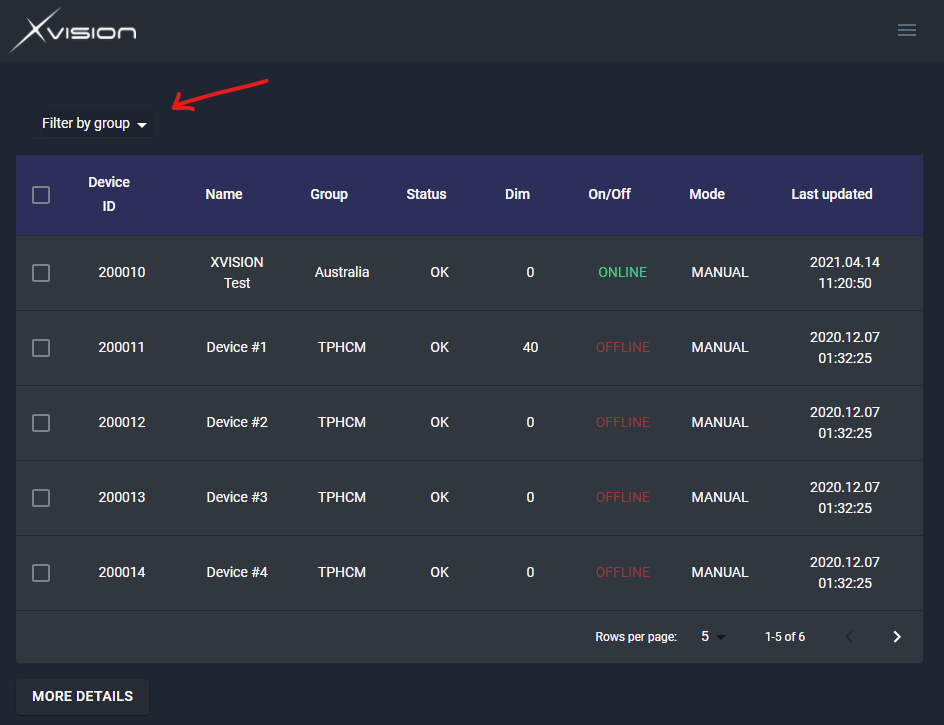
If the device hasn’t connected to the cloud for more than 1 hour, it is displayed as OFFLINE, otherwise, it is shown as ONLINE.
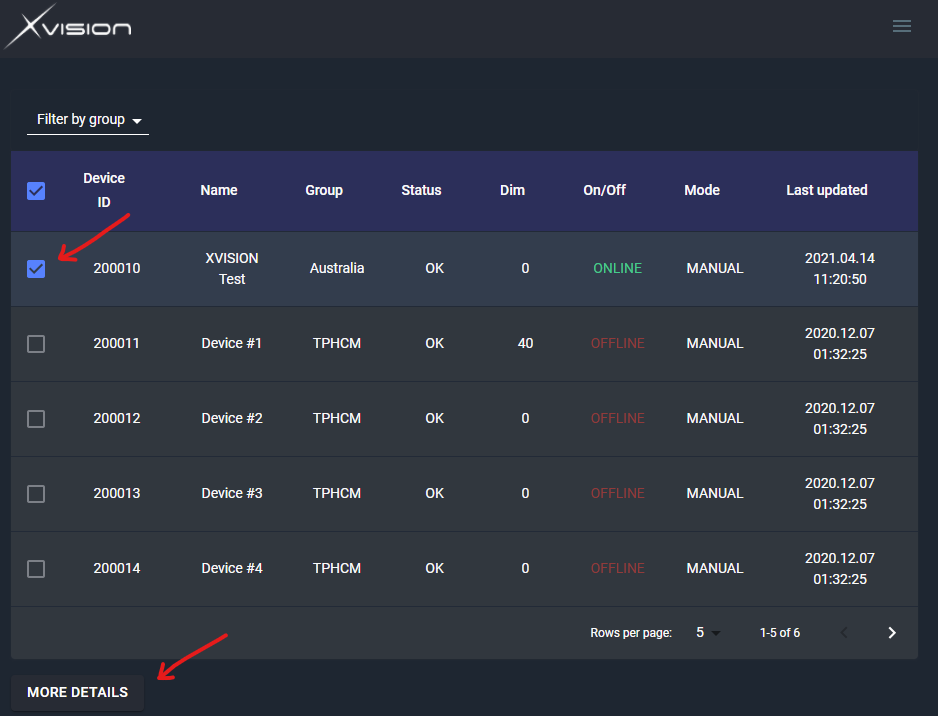
To view a particular device, choose that device from the table, then click “MORE DETAILS”
Alternatively, the user can hover the mouse over the device displayed on the map, and click “More details” on the tooltip.
To enter full-screen mode, click the Zoom icon on the top right corner of the map.

3. Device details page
Users can view the detailed status of the device and control the device from this page.
Select sensor type and history range from the drop-down box to view the graphs of the sensor data
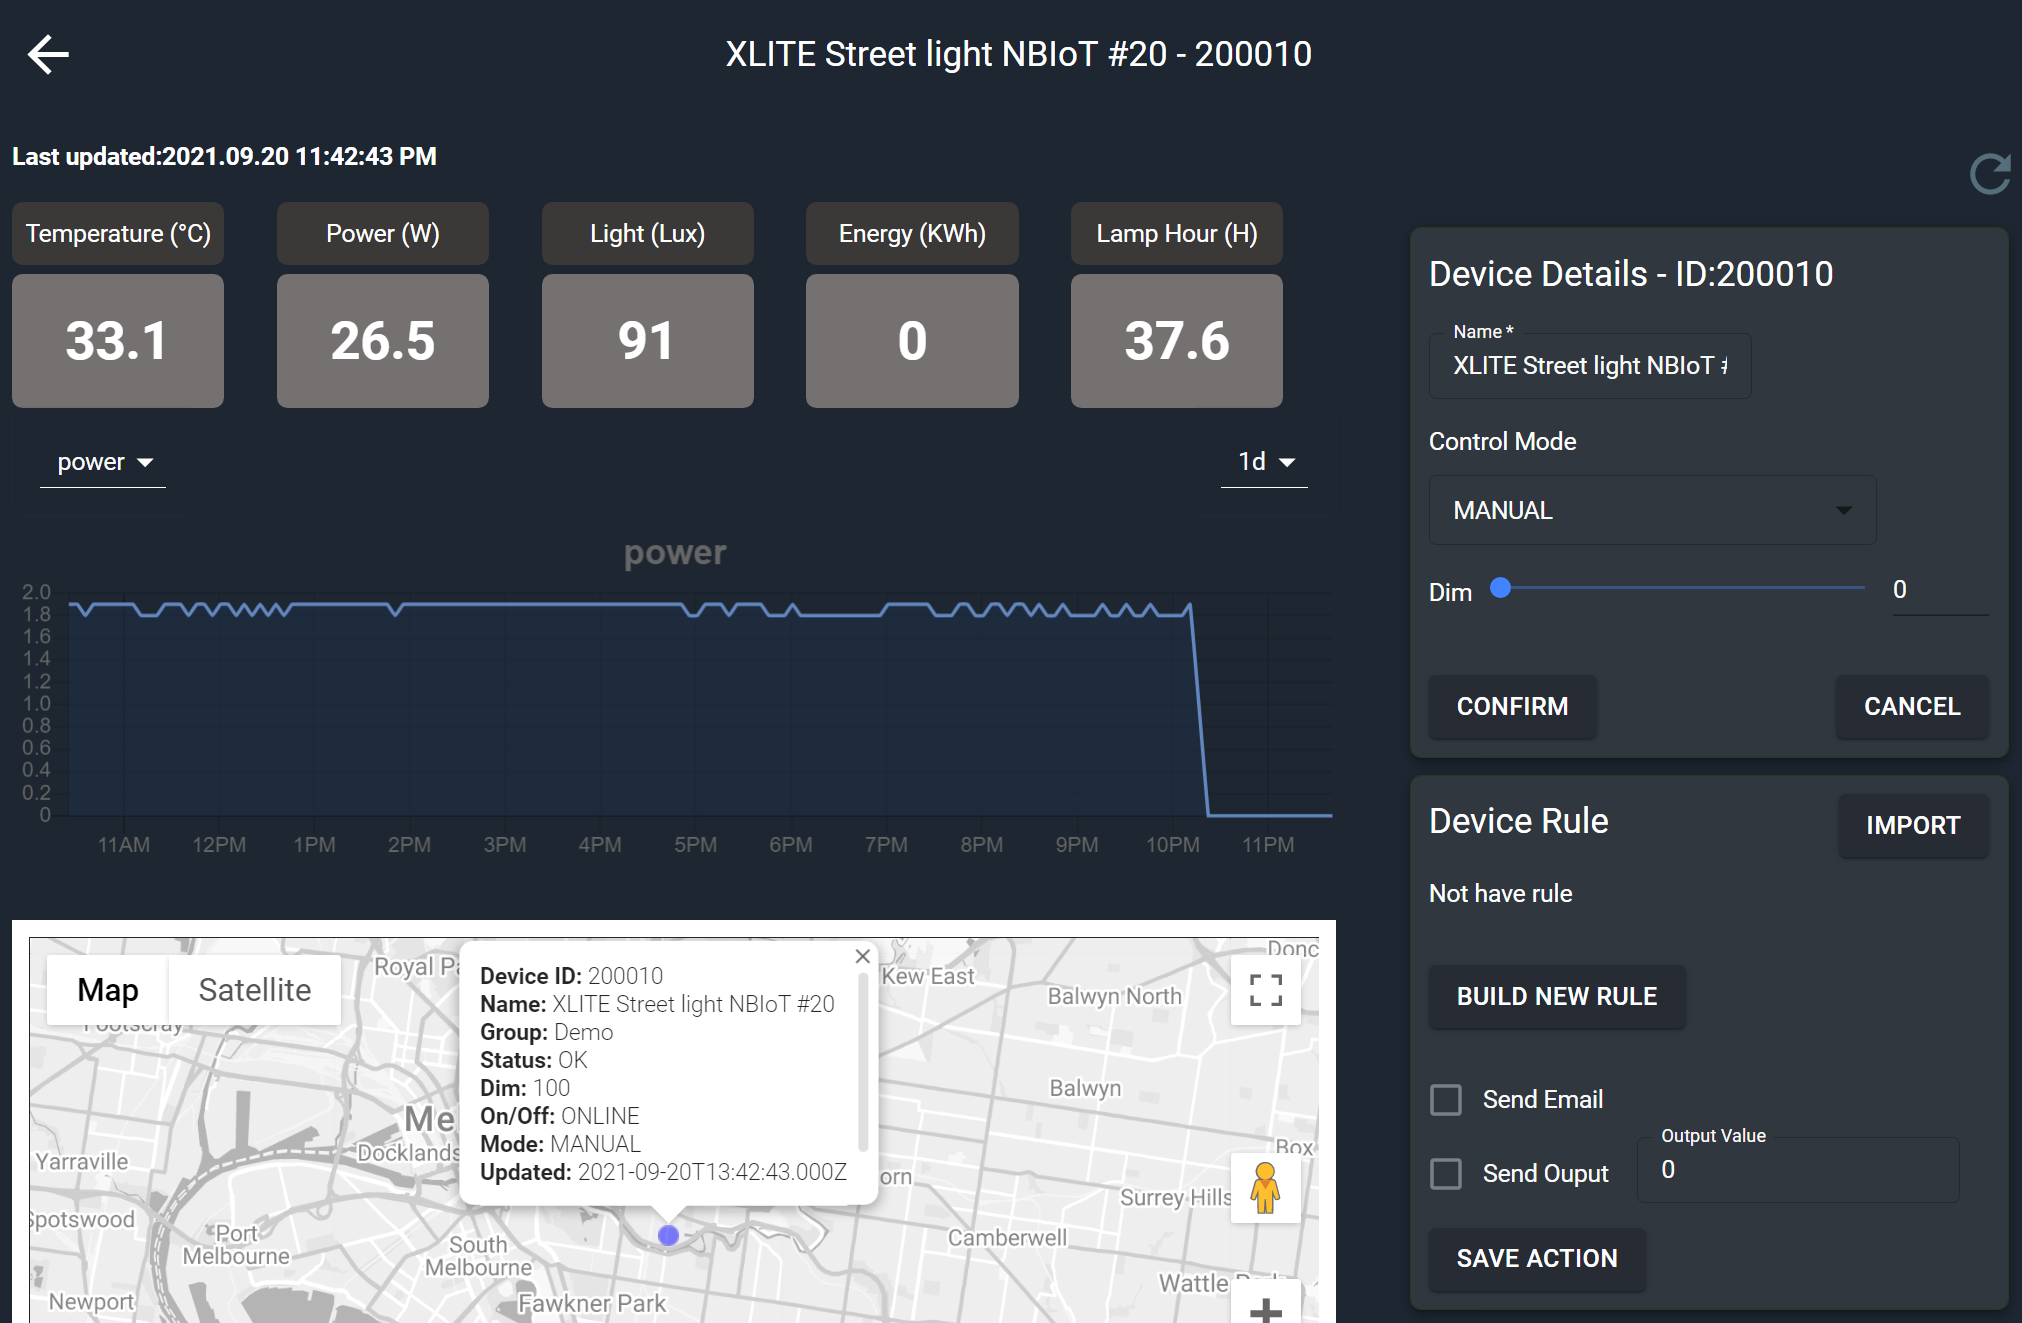
From the control box, the user can:
Change the device name.
Change the Control Mode:
MANUAL: Change the dim manually via the slider below.
AUTO: The dimming level is controlled automatically by the light sensor, if the light sensor is low ( <50 lux by default, the light is turned on, and vice versa). This light sensor threshold can be changed from the cloud service.
SCHEDULED: The dimming level is controlled by the defined schedule (next page)
The Dim slider is only used for MANUAL control mode, the device will not respond for other modes.
When finished, click “CONFIRM” to apply the changes, or “CANCEL” to revert changes.
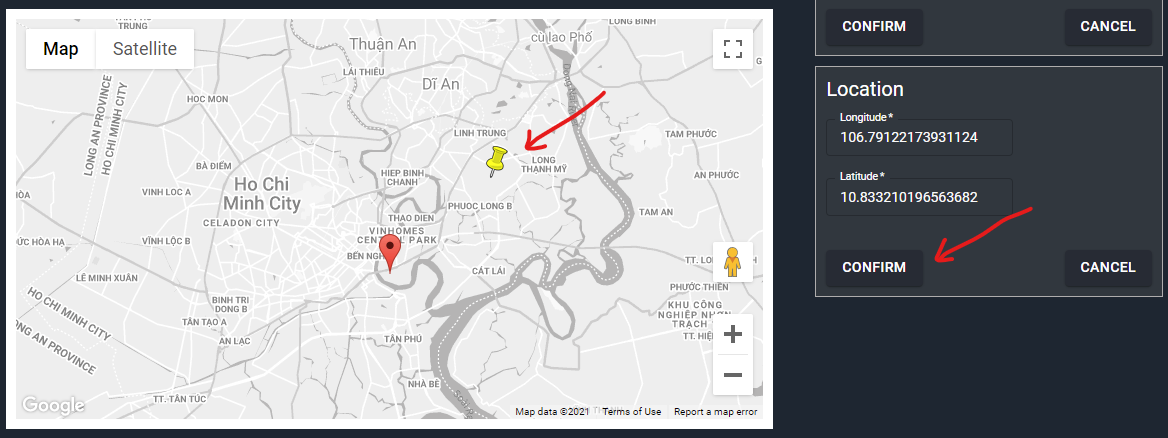
The XLITE NB-IoT is equipped with a built-in GPS module, in which the actual location is reported to the cloud service and displayed on the map. Otherwise, if the location information is not available from the device, the user can define the correct location of the device on the map.
To set a new location of the device, left click at a different point on the map, a new marker will be displayed, and the coordinates in the box will change accordingly. Click “CONFIRM” to accept the new location.
4. Group page
The user can define a group, add & remove devices to a group, edit and delete a group from this page.
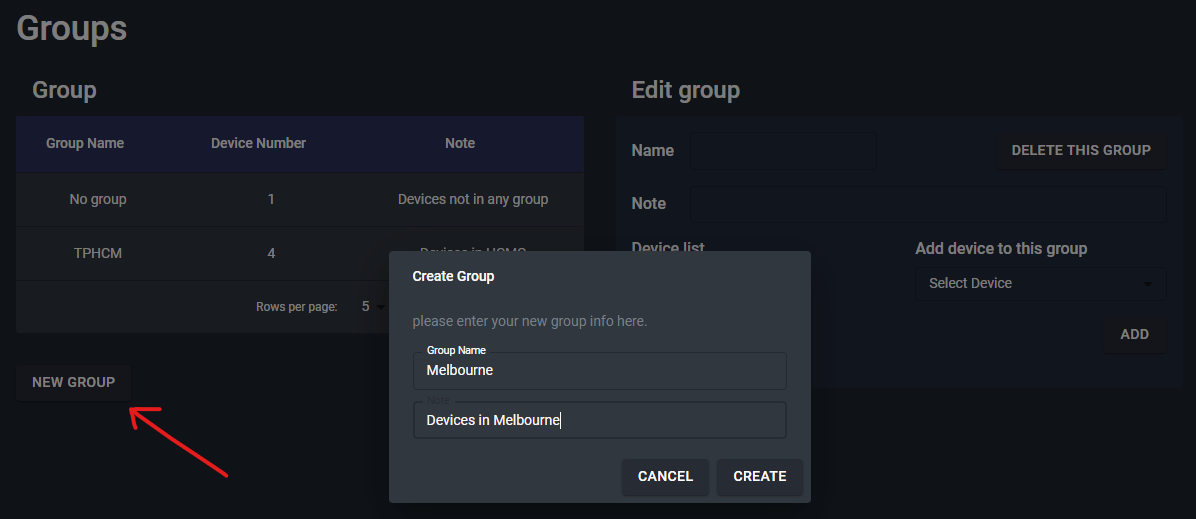
Click “NEW GROUP” to define a new group, give it a name and a description for easy management
To add a device to an existing group, select the available device in the drop-down box and click “ADD”. To remove an existing device in the group, click the delete icon next to that device.
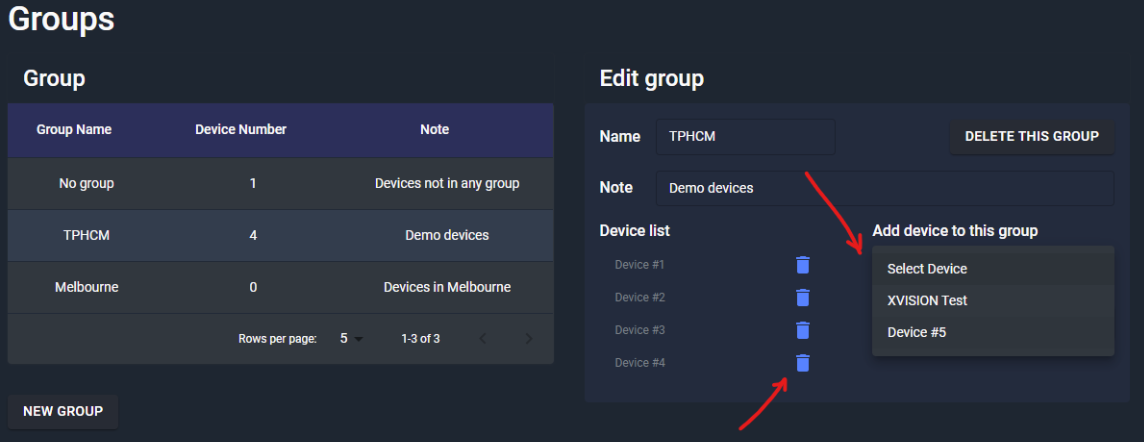
Only one group per device is allowed, i.e. a device can only belong to one group. The available devices on the drop-down box only show devices that not in any group.
5. Schedule page
This page configures the dimming schedule of the devices, if the control mode “SCHEDULED” is selected.
The schedule only applies for a group of the devices (i.e. all devices in a group will have the same schedule), ensure the group is properly defined before add or edit schedules.
Click “NEW” to define a new schedule, give it a name and select the corresponding group.
On the “Create a schedule” page, on each day of the week, the user can define a maximum of 8 slots to dim the light. Click “+” to add a new slot, select the time and dim value, then click “CONFIRM”. Click “-” to delete the last slot.

Users can also highlight the input box to type the time directly.
A sample schedule is shown below, the tooltip on the slide bar will show the corresponding % in the slot.

Users can edit each slot directly by changing the time or sliding the dim value, or deleting the current slot by clicking “X” next to it.
The device will use the nearest scheduled time in the past to control the dim at now, in the above example, if the time is now 11 PM, it will use dim = 70% from 10 PM.
If the dim of the day is empty, the device will use the scheduled dim of the previous days (if it is not empty). For example, if the schedule of Friday is empty, the device will try to use the schedule of Thursday, or Wednesday if Thursday is empty, and so on.
The schedule on the day will be auto-sorted by time, so they can be added in any order.
Ensure no duplicated time in different slots in a day, otherwise, the latter slot will override the previous slot.
To edit an existing schedule, click on the “Edit” icon next to the selected schedule. Alternatively, click the “Delete” icon to delete it.
The existing schedule can be copied to a new one, click “Duplicate” to make a new copy.
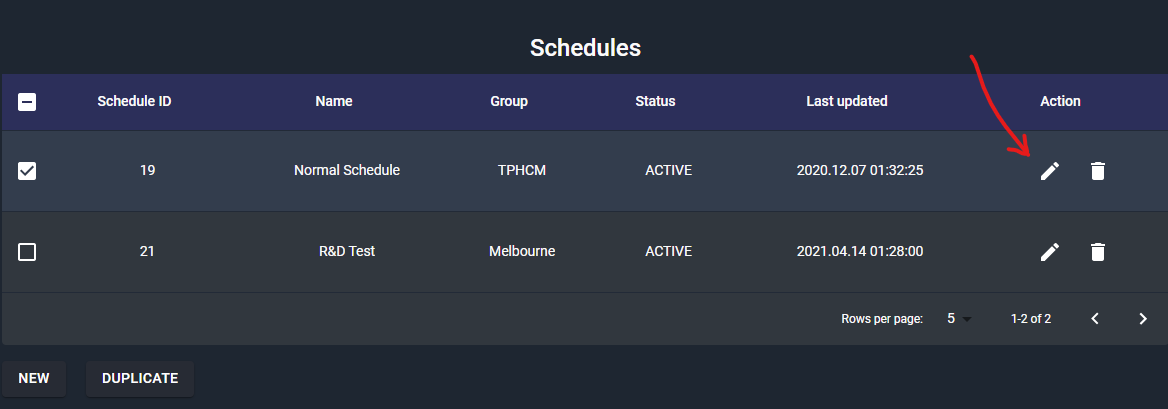
A group can have multiple schedules, but only one “ACTIVE” schedule is allowed at a time. Choose “Activated” to select the schedule to use.

Ensure only one “ACTIVE” schedule for one group to avoid duplicated commands sent to the devices.
6. Report page
Users can select the device and define the range of the data to generate the report
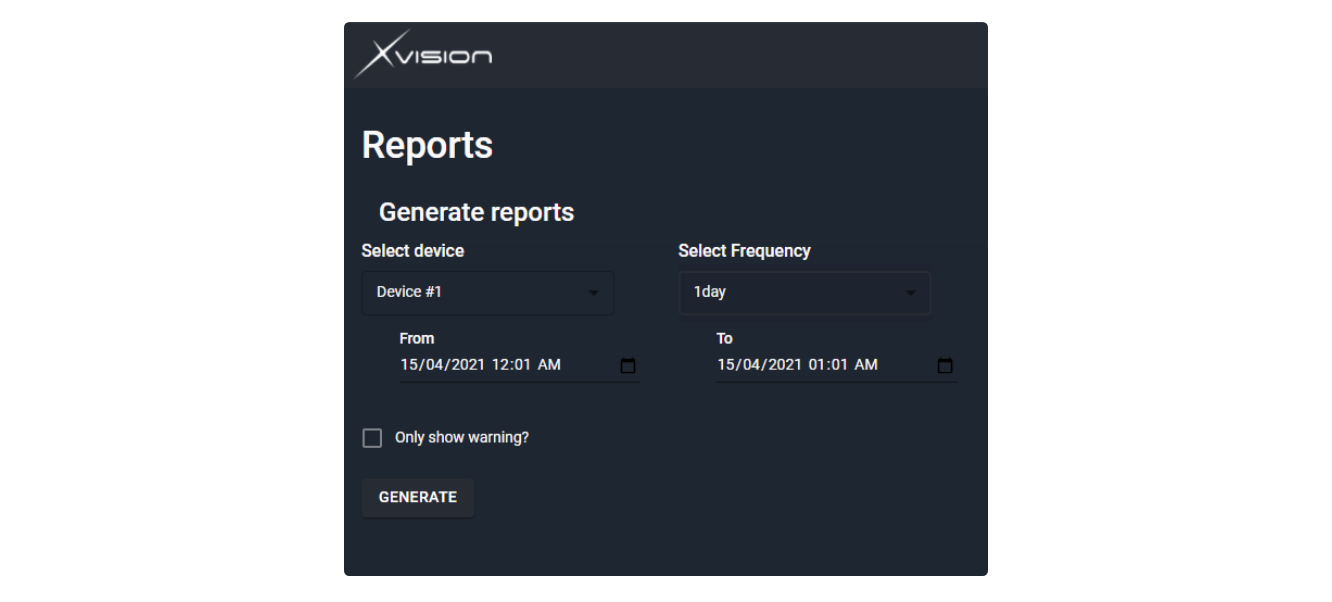
Contact XVISION Technology Sales to have a customized report template and other formats if required.
7. Account page
The account page has options for users to change account settings, as well as allows the admin to manage other users.
Users can use this form to change:
Display Name.
Address (to correctly calculate timezone for schedule).
Enable receiving system-generated email.
Change password.

8. User roles (ADMIN only)
The following user management functionalities are only available for ADMIN users
XLITE Dashboard has 2 basic user roles: ADMIN and OPERATOR
ADMIN is able to create and edit device groups, then assign groups to its OPERATOR user.
One OPERATOR can manage multiple groups, however, one group can only be managed by one OPERATOR.
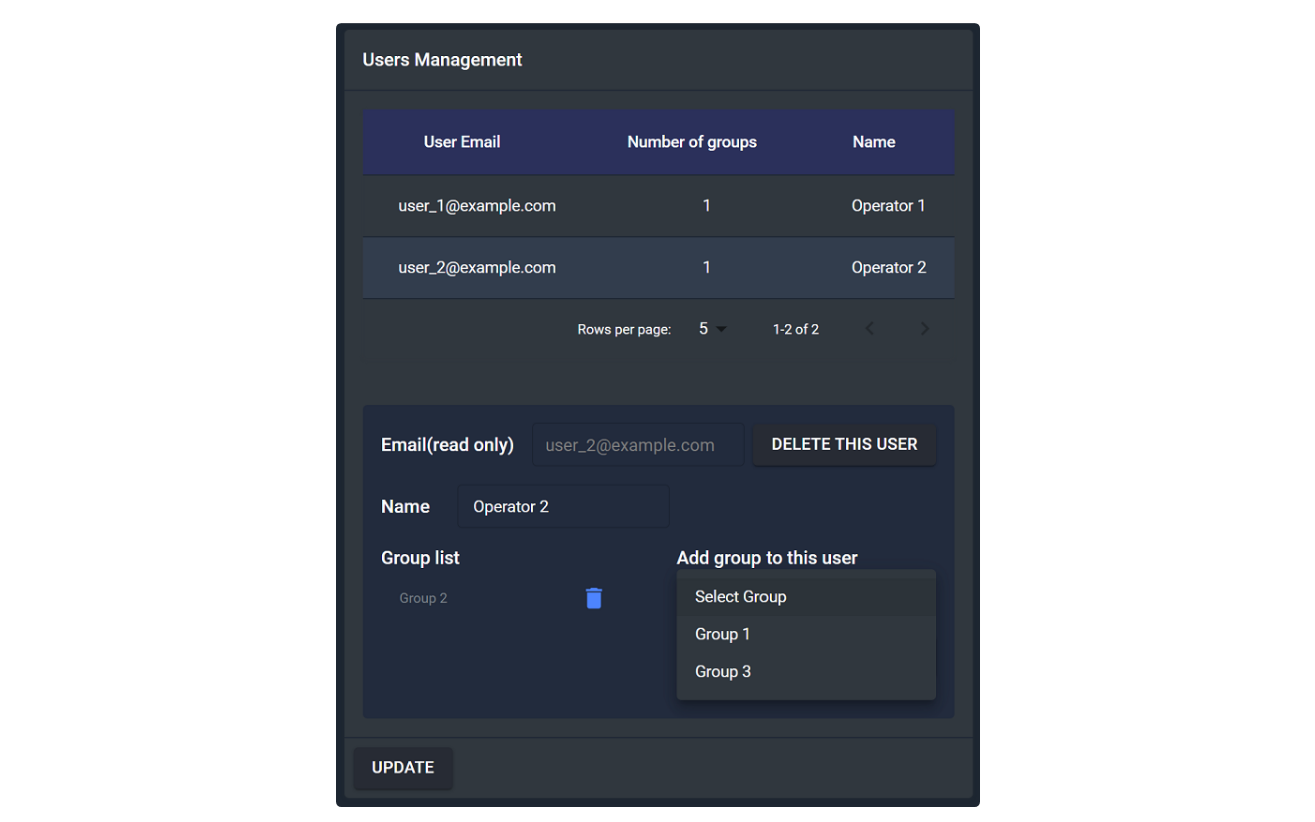
To assign new groups or edit existing groups of the OPERATOR user, following the steps below:
On the Users Management panel, select the corresponding OPERATOR user.
The list of groups managed by this user is displayed in the “Group list” panel.
To add a new group to this OPERATOR user, select the drop-down box “Add group to this user” on the right, then select the desired group, click “ADD”, then “UPDATE” to finalize the process.
To delete an existing group from the OPERATOR, click on the delete icon next to the group name, then click “UPDATE”.
The OPERATOR after logged in can only see and manage the devices and groups which have been assigned using the above steps by the ADMIN.