XLITE - Quick Start Guide
Following these steps to set up and provision the XLITE Controller
The device contains an AC voltage of up to 240V
1. Power up and check LED status
If using the XLITE-NB model, insert a compatible SIM card into the controller before applying power. Only remove or insert SIM card when the power is off.
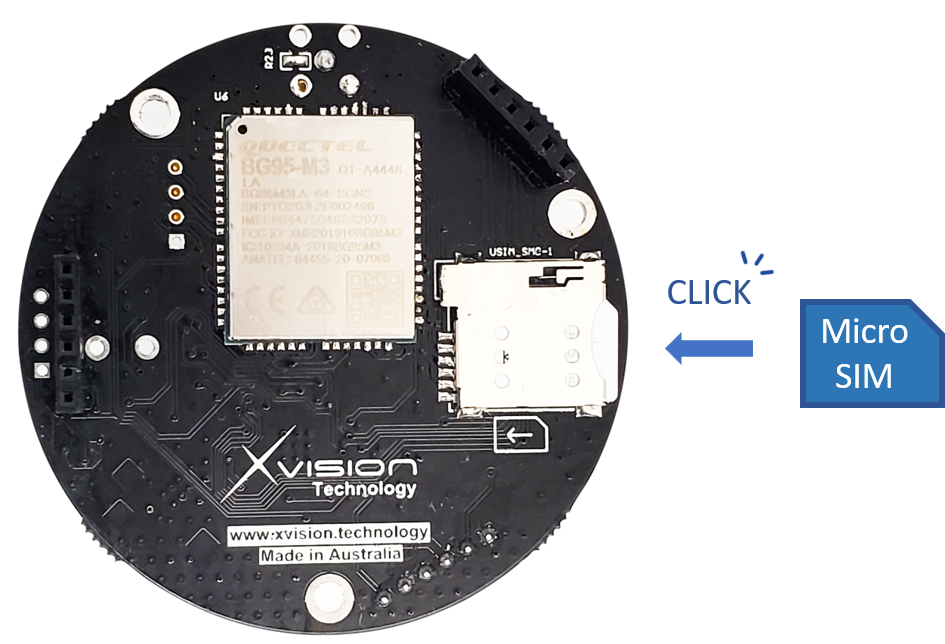
Push in the SIM card until hearing a “Click” to lock.
To remove the SIM card, push in again to unlock.
After applying power, the POWER LED should be ON, and the status of the device is indicating by the LEDs as shown below:
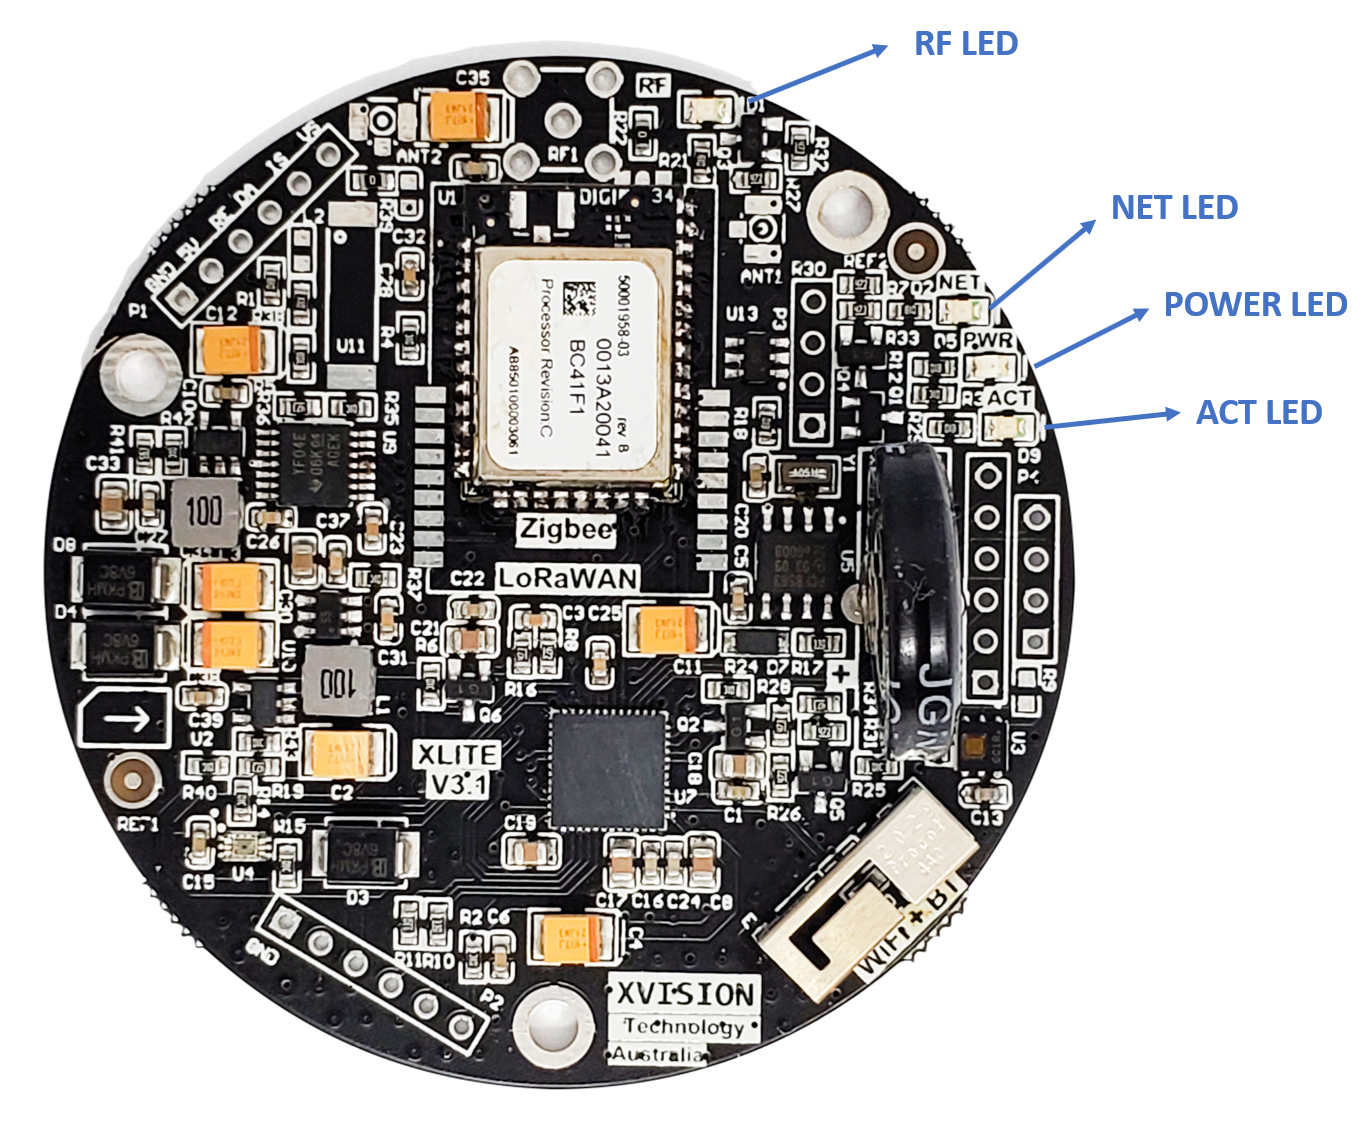
RF LED is connected directly to the RF module (NB-IoT/Zigbee/LoRaWAN) and operates independently with NET_LED and ACT_LED.
Controller status | NET LED | ACT LED |
|---|---|---|
Running normal | Blink slow (1Hz) ● ● ● ● | |
Update firmware | Blink fast (5 Hz) ● ● ● ● ● ● ● | Blink fast (5 Hz) ● ● ● ● ● ● ● |
GPS Location Fix (NB-IoT and LTE-M) | Solid blue _______________________________ | Blink slow (1Hz) ● ● ● ● |
Module Initializing (Zigbee/LoRaWan ) | Blink slow (1 Hz) ● ● ● | Blink slow (1 Hz) ● ● ● |
Error | Solid green _______________________________ |
Network status | RF LED |
|---|---|
Network Searching (NB-IoT and LTE-M) | Blink slow short pulse (0.5 Hz) ● ● |
Network Idle (NB-IoT and LTE-M) | Blink slow long pulse (0.5 Hz) ________________ _______________ |
Transmit/Receive (NB-IoT and LTE-M) | Blink fast (4 Hz) ● ● ● ● ● ● ● |
Command received (Zigbee/LoRaWan) | Blink once ● |
2. Connect to the device’s WiFi network
On startup, the XLITE controller will attempt to connect the saved WiFi network, if the saved network is not available or hasn’t been configured, the device will start a WiFi access point (hot-spot).
If the device is connected to the wifi router from saved SSID and Password, the device’s configuration page can be accessed from its IP address. This IP address can be obtained from an IP Scanner Software or using XVISION Device Manager.
Advance IP Scanner Software: https://www.advanced-ip-scanner.com
Using a laptop or PC with a WiFi connection, connect to the XLITE WiFi network “XLITE-XXXXXX” where XXXXXX is the serial number, using the default password as printed on the device’s label.
If the connection is successful, using a web browser to enter the device configuration web page at:
http://192.168.4.1
At the login page, enter the following default username and password:
Username: admin
Password: *******
Contact XVISION Supports or Sales Representatives to obtain the login details.
3. Device configuration
The “Home” page showing the current status of the device.
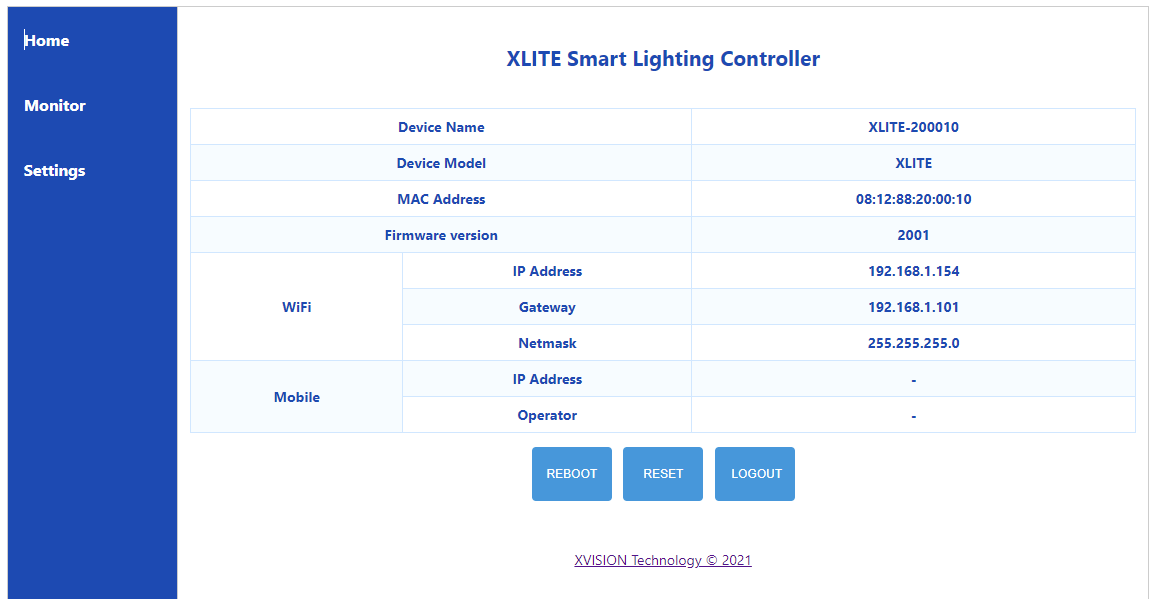
REBOOT: force reboot of the device
RESET: reset device to factory settings, clear WiFi SSID & Password, press REBOOT or power cycle device to finish.
LOGOUT: exit session
The “Monitor” page showing the sensor values measured from the device, including Power, ambient light level, and onboard temperature.

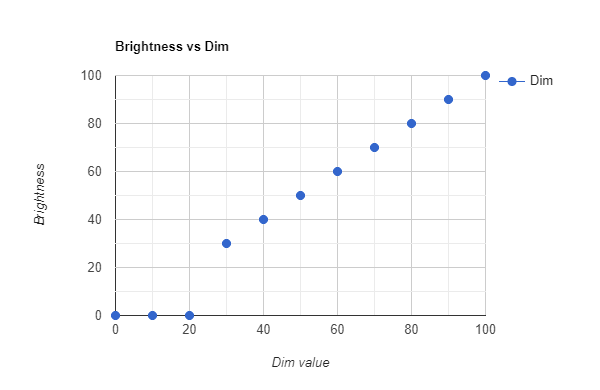
The dimming level can be controlled by the slider at the bottom of the page, the brightness of the light is changed according to the sliding value.
The controller has a “dead zone” where the dim value is below a threshold (i.e. 20%, can be set by user), the light is turned off (brightness = 0%), otherwise the brightness is linearly proportional to the dim value up to 100%. See graph below for detail.
The “Settings” page allows the user to enter the SSID and Password of the WiFi router wished to connect, or changing the APN of the operator (XLITE-NB model only), and starting firmware update.
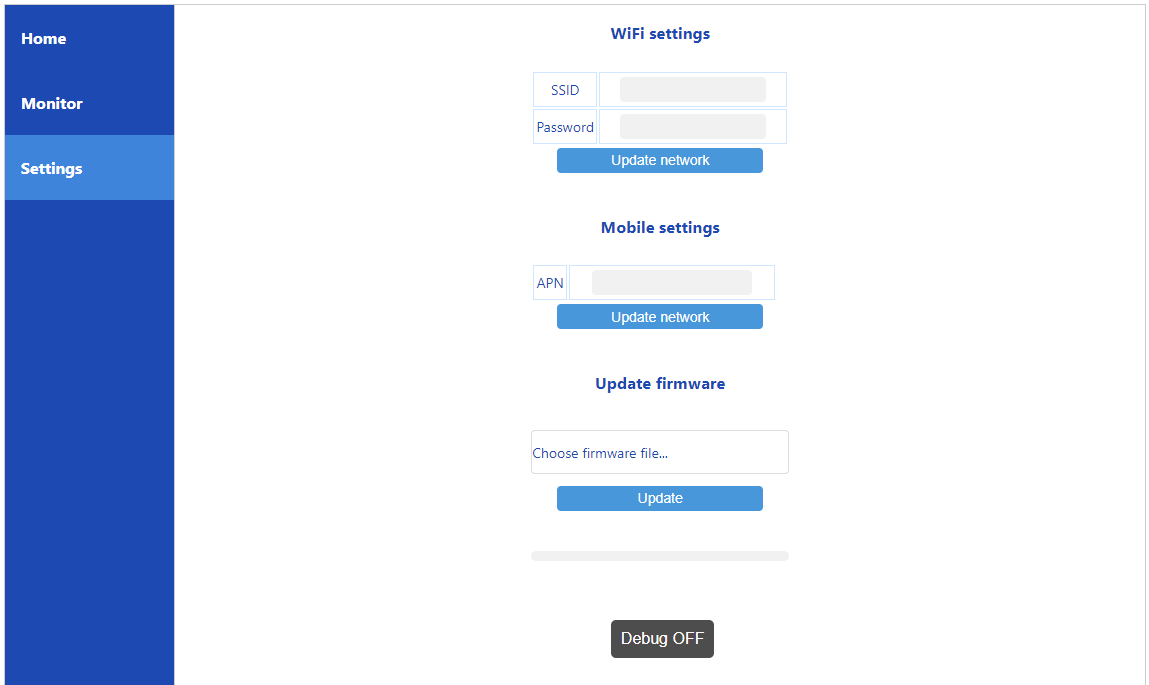
The latest firmware can be downloaded here:
4. Extra configuration for XLITE Zigbee devices
Model XLITE-X has the extra configuration to join a Zigbee network created by the XWAN gateway. At the Settings page, change the Network ID if required to join a different network, then reboot to take effect.
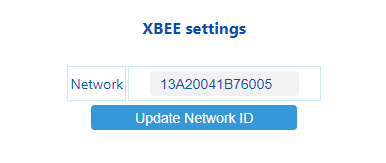
Normally the network ID is the address of the XBee module integrated inside the gateway. Make sure the gateway is on and operating normally before power up the devices to successfully establish a network.
All the communication between XBee devices and the gateway is encrypted and protected by a Network Key, therefore a new device can not simply join an existing network without a valid key.